How to Use Resistance Bands: A Beginner’s Guide
Want to (really) know how to use resistance bands? Featuring 30+ exercises across 9 muscle groups and 5 types of resistance bands.


Lightweight and portable. Versatile. Mostly affordable. What’s not to love about resistance bands?
Um, maybe this:
Ouch, bro 🫣. Jokes aside, given that you’re here, your issue is probably this. You don’t know how to use resistance bands beyond the usual, boring old, banded hip abductions.
Well, don’t worry.
This article will teach you everything to know about how to use resistance bands, including:·
- An introduction to the different types of resistance bands available
- 34 resistance band exercises you can incorporate into your training routine and
- Tips to getting the most out of your resistance bands (and avoiding nasty accidents like the one above)
Types of resistance bands
Wait a minute. 34 resistance band exercises?
If you have this expression 🤨 on your face, we're willing to bet it’s because you think there’s only 1 type of resistance band available in the market: mini bands, or, colloquially speaking, “booty bands”. They are the most popular, after all.
Fortunately, you're mistaken. There are 5 different types of resistance bands:
How to use resistance bands
Alright. Now that you're all acquainted with all the different types of stretchy bands available, let's look at how to use resistance bands in your workouts. Or, more specifically, the exact resistance band exercises you could do.
I've categorized the exercises by muscle groups so you can screen for what you're looking for.
Arm exercises
Banded concentration curl
Targets: Biceps
What to use: Tube bands with handles, figure-eight bands, pilates bands, large loop bands
How to perform the banded concentration curl:
- Sit on a bench, stool, or chair with your feet wide.
- Place one end of your resistance band under your right foot and hold the other in your left hand while resting your left elbow on your left thigh.
- You might need to lean forward slightly to get to this starting position. Keep your core engaged and your back straight.
- Make sure the band is already taut, even at the starting point. Now, perform a bicep curl by pulling your left hand toward your left shoulder.
Tip: Initiate the movement with your biceps. Use your free hand to stabilize your torso throughout.
Banded standing bicep curl
Targets: Biceps
What to use: Tube bands with handles, pilates bands, large loop bands
How to perform the banded standing bicep curl:
- Stand shoulder-width apart, with your feet placed over the middle of the band.
- Grab a handle (or the end of the bands) in each hand, starting with your arms relaxed, down at your sides.
- With palms facing in front of you, perform a bicep curl by bending at the elbow. Make sure you get a good bicep contraction. Keep your core engaged and back straight throughout the movement.
Tip: You don’t want to use momentum (or your lower back) to ‘jerk’ the resistance bands up. Instead, concentrate on initiating the curl with your biceps.
Banded tricep kickback
Targets: Triceps
What to use: Tube bands with handles, pilates bands, large loop bands
How to perform the banded tricep kickback:
- Anchor your band to something stable in front of you.
- Bend your knees slightly and hinge forward at the hip. This is your hip hinge position. Remember to brace your core for stability..
- Bend your elbows to 90 degrees, keeping your arms close to your sides (around shoulder-width apart).
- From here, do a tricep kickback by extending your arms from the elbows and focusing on keeping the rest of your arms still while you perform the movement.
- Re-bend your elbows to return to the starting position.
- Do all the reps on one side, then repeat with the other foot (i.e., left one) forward.
Tip: Minimize the movement of your upper arm by keeping it close to your torso. Resistance band is anchored around elbow height.
Banded tricep extension
Targets: Triceps
What to use: Tube bands with handles, pilates bands, large loop bands
How to perform the banded tricep extension:
- Use a staggered stance, placing the middle of the resistance band under your back foot. Hold on to the resistance band with both hands behind your head. Elbows are bent and your upper arms are right beside your head.
- Brace your core and straighten your elbows, bringing the resistance bands upwards and over your head.
Tip: Brace your core throughout the movement for stability. Keep your upper arms in the same position throughout (beside your head), focusing on straightening your elbows only.
Shoulder exercises
Band pull apart
Targets: Rotator cuffs
What to use: Tube bands with handles, figure-eight bands, pilates bands, large loop bands
How to perform the band pull apart:
- Stand with your feet hip-width apart and hold one end of your resistance band in each hand.
- Raise your arms to chest level with your palms facing down. Keep your arms straight and hands about 6 inches apart. The band should have a small amount of tension – no need for it to be overly taut.
- Pull the band apart by extending your arms to each side, keeping them at the same height. Keep your arms straight throughout the movement.
- Return your arms to the center.
Tip: This is a great warm-up exercise for your rotator cuffs. Perform the exercise with slow and controlled movements. You won’t need a lot of resistance for this exercise.
Banded overhead press
Targets: Shoulders (front delts)
What to use: Tube bands with handles, pilates bands, large loop bands
How to perform the banded overhead press:
- Stand with your feet shoulder-width apart with a resistance band looped under each foot.
- Hold the band a little wider than shoulder-width, with your arms bent and palms facing forward.
- Press the band directly over your shoulders until your arms are above your head.
- Lower your hands to the starting position.
Tip: Brace your core throughout the movement. This keeps your setup stable and prevents you from hyperextending your lower back excessively during the exercise. You can also try a staggered stance if you prefer.
Banded front raise
Targets: Shoulders (front delts)
What to use: Tube bands with handles, pilates bands, large loop bands
How to perform the banded front raise:
- Get your resistance band, loop it under your feet, and hold the ends of it in each hand. Have your arms relaxed and at your sides.
- Raise your arms straight in front of you until they’re parallel to the floor and perpendicular to your torso. Your hands should be at shoulder level.
- Pause for that contraction at the top, then slowly lower back to the starting position.
Tip: The key to this exercise is in slow and controlled movements. Make sure you’re really performing the eccentric portion of this exercise (i.e., the lowering) with your shoulders instead of letting it free-fall. You won’t need a lot of resistance for this exercise.
Banded lateral raise
Targets: Shoulders (middle delts)
What to use: Tube bands with handles, pilates bands, large loop bands
How to perform the banded lateral raise:
- Get your resistance band, loop it under your feet, and hold the ends of it in each hand. Bend your elbows slightly.
- Raise your arms to the side in a 45-degree to your body until they're at shoulder height.
- Pause, then slowly lower your arms back down to the starting position.
Tip: Think about leading the movement with your elbows. You can also use a staggered stance for this.
Banded upright row
Targets: Shoulders (middle delts)
What to use: Tube bands with handles, pilates bands, large loop bands
How to perform the banded upright row:
- Stand on a band with both feet and grab one end with each hand.
- Pull the band upwards (towards your shoulders). Lead the movement with your elbows.
- Slowly lower the resistance band back to the starting position.
Tip: Skip this movement if you have existing (or are at higher risk of developing) shoulder injuries. This might cause discomfort if you have shoulder impingement.
Banded bent-over rear delt fly
Targets: Rear delts
What to use: Tube bands with handles, pilates bands, large loop bands
How to perform the banded bent-over rear delt fly:
- Sit at the edge of a bench or chair, positioning your feet over the middle of the band.
- Cross the band at your knees, grabbing the ends of the resistance band with your palms facing each other.
- Bend forward at your waist, with your back in neutral position, and raise your arms to your sides until the band reaches shoulder level.
- Slowly lower to the starting position.
Tip: Think about leading the movement with your elbows.
Chest exercises
Banded push-up
Targets: Chest
What to use: Large loop bands, pilates bands
How to perform the banded push-up:
- Get in a push-up position, draping the resistance band across your upper back.
- Loop the ends of the band through your thumbs and place your hands on the floor.
- Keep your core and quads engaged, then bend your elbows until your chest touches the floor.
- Push straight up until you return to your starting position.
Tip: Remember to keep your quads nice and tight throughout the movement. When your quads are relaxed, your legs bend, and your lower back tends to sag – which you don't want for proper form. It’ll also help to brace your core.
Banded incline chest press
Targets: Chest (upper chest)
What to use: Tube bands with handles, large loop bands, pilates band
How to perform the banded incline chest press:
- Get into a lunge position with your right foot in front. Place the middle of your band beneath your left foot (back foot). Grab the ends of your band in each hand and bring the band to the shoulder level.
- Press the bands upward at a 45-degree angle over your chest until your arms are fully extended.
- Slowly return to the starting position.
Tip: Pause at the top of every rep to feel the contraction in your upper chest. Keep your shoulders stable by retracting your scapula (i.e., squeeze your shoulder backward).
Banded standing chest press
Targets: Chest
What to use: Tube bands with handles, pilates band, large loop bands
How to perform the banded standing chest press:
- Anchor your resistance band to something secure and steady (e.g., wall column) at chest height.
- Grab the ends of your resistance band with each of your hands, with your back facing the band.
- Step forward to reduce the slack. Position your hands at chest height.
- With elbows up and palms facing down, press the band straight out in front of you until your arms reach full extension, and squeeze those chest muscles.
- Return to the starting position.
Tip: Brace your core and retract your scapula (i.e., squeeze your shoulder backwards). If you’re using greater resistance, it can be hard to stay balanced. You can try a lunge position (i.e., with a foot in front of the other) instead. The forward lean will prevent you from falling back.
Banded standing chest fly
Targets: Chest
What to use: Tube bands with handles, pilates bands, large loop bands
How to perform the banded standing chest fly:
- Depending on your preference, you can do a split stance (i.e., one foot in front of the other) or with your feet at hip-width apart.
- Anchor your resistance band to something secure and steady (e.g., wall column) at chest height.
- Grab the ends of your resistance band with each of your hands, with your back facing the band.
- Step forward to reduce the slack. Position your hands at chest height.
- Allow your hands to go back as far as you can to get a good stretch in the chest, then contract your chest so that you bring your hands to meet in the center in front of you. Your arms should be slightly bent at the elbows.
- Slowly release the tension and return to the starting position.
Tip: Maintain a stable setup for your shoulders by retracting your scapula (i.e., squeeze your shoulder backwards).
Back exercises
Banded bent-over row
Targets: Back (lats and rhomboids)
What to use: Tube bands with handles, pilates bands, large loop bands
How to perform the banded bent-over row:
- Stand over the center of the band with feet shoulder-width apart.
- Bend slightly at your knees and hinge at your waist, keeping your hips back.
- Grab the ends of your resistance band with each hand, with your hands facing the outsides of your knees.
- Pull the band up toward your core until your elbows form a 90-degree angle at the top position.
- Slowly lower back down to the starting position.
Tip: If you want to target your upper-back muscles, pull the band higher to your chest. On the other hand, if you want to target your mid-back muscles, you should pull the band closer to your waist. Think about moving your elbows past your torso.
Banded seated row
Targets: Back (lats and rhomboids)
What to use: Tube bands with handles, pilates bands, large loop bands
How to perform the banded seated row:
- Sit on the floor with your legs extended in front of you. Place the center of your resistance band behind the soles of your feet.
- Grab the ends of your resistance bands in each of your hands, with your arms extended and palms facing each other.
- Sitting nice and tall, bend at your elbows and pull the band toward your core.
- Slowly return to the starting position.
Tip: Keep your shoulders retracted for a nice and strong setup. Think about leading the movement with your elbows and moving them past your torso.
Banded lat pulldown
Targets: Back (lats)
What to use: Tube bands with handles, pilates bands, large loop bands
How to perform the banded lat pulldown:
- Anchor your resistance band overhead to a horizontal bar (or anything steady, really), pulling the free ends down at your sides.
- Kneel facing the anchor so the band is positioned in front of you.
- Grip each end of your resistance band with each hand, with your arms extended overhead and hands slightly wider than shoulder-width.
- Bending your elbows, pull the band down toward the floor while contracting your back muscles.
- Once your hands reach your shoulders, slowly raise them back to the starting position.
Tip: Remember to initiate the movement with your lats. One thing I like to think about when performing the banded lat pulldowns is to think about pulling my elbows down till they can point downwards (to the floor). You can do this seated or kneeling.
Abs exercises
Banded kneeling crunch
Targets: Abs
What to use: Tube bands with handles, pilates bands, large loop bands
How to perform the banded kneeling crunch:
- Attach your resistance band to a high anchor (i.e., pull-up bar or top of a door) and kneel, grabbing each side of the band.
- Extend your elbows out at shoulder level, engage your core, and crunch down toward your hips while contracting your abs.
- Slowly return to the starting position.
Tip: Round your back on this one; this will help you fully engage your abs instead of your hip flexors. To be precise, they minimize the work your hip flexors are doing and maximize the load your abs are under.
Banded Russian twist
Targets: Abs (obliques)
What to use: Tube bands with handles, pilates bands, large loop bands
How to perform the banded Russian twist:
- Sit on the floor with your legs extended in front of you and wrap the center of your resistance band around the bottom of your feet.
- Hold the ends of your resistance band in each hand. Slightly bend your knees, keep your feet on the floor, and lean back at a 45-degree angle.
- Rotate the band left by bringing your right hand across your body and your left hand down by your left hip.
- Contracting your oblique muscles, bring the band toward your left hip while keeping your middle and lower back neutral.
- Return to the starting position.
Tip: Move slowly and remember to breathe (!) while performing this exercise. Don’t disengage your core by leaning back when fatigue sets in. You can also anchor the band to something stable in front of you, instead of holding it with your feet.
Banded woodchopper
Targets: Abs (obliques)
What to use: Tube bands with handles, pilates bands, large loop bands
How to perform the banded woodchopper:
- Anchor your resistance band near the top of a cable column or support (anything steady, really).
- With your right side toward the support, grab the free end of the band with your arms stretched out overhead.
- Pull the band down and across your body to the front of your knees in one smooth motion while rotating your right hip and pivoting your back foot.
- Slowly return to the starting position.
Tip: Avoid bending your arms excessively while performing the woodchoppers. If you do, you won’t have to work as hard as the “weight” is closer to your body. Also, ensure you're rotating your torso and your arms stay in front of your body. Don't just swing the band with your arms.
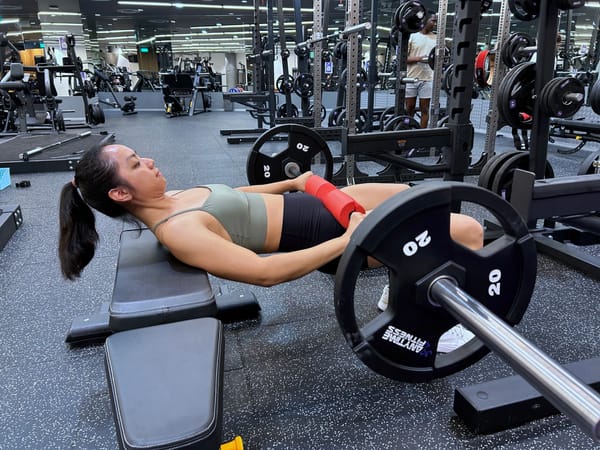
Banded reverse crunch
Targets: Abs (lower abs)
What to use: Large loop bands
How to perform the banded reverse crunch:
- Anchor your resistance band on low support.
- Lie face up, with your knees bent at a 90-degree angle. Wrap the band around the top of both feet and scoot back to create tension.
- With your abs tight and back flat, pull your knees toward your shoulders and contract your abs.
- Slowly return to the starting position.
Tip: Moving slowly, with controlled movement, is key to the reverse crunch.
Quads exercises
Banded front squat
Targets: Quads
What to use: Pilates band, large loop bands
How to perform the banded front squat:
- Stand on your resistance band with feet slightly wider than shoulder-width.
- Hold the ends of your resistance bands with each of your hands and bring the top of the band over each shoulder. If your band is too long, secure it by crossing your arms at your chest.
- Squat with your chest up and abs firm. Push yourself up while ensuring the pressure remains in the center of your feet.
Tip: Make sure your knees are tracking in the same direction as your feet. You don't want them to bunch in at any time of the exercise. If you’re still learning the movement, practicing with a mini band around your knees might help.
Banded lunge
Targets: Quads
What to use: Tube bands with handles, pilates bands, large loop bands
How to perform the banded lunges:
- Place your left foot in front of your right foot (i.e., get into a staggered feet position.)
- Step on your resistance band with your right foot.
- Grip each end of your resistance bands with each of your hands and raise your hands to shoulder height.
- With your back straight and chest up, lower your hips until your front thigh is almost parallel to the floor.
- Push back up.
- Complete all the reps on one side before switching to the other foot.
Tip: Remember to push through your midfoot, ensuring an even distribution of force throughout your foot. Also, as with any squatting exercises, keep your knees tracking in the same direction your feet are pointing.
Banded lying leg extension
Targets: Quads
What to use: Tube bands with handles, pilates bands, large loop bands
How to perform the banded lying leg extension:
- Set up by lying face up with your arms bent by your sides. Hold the ends of your resistance bands with each hand.
- Bend your right knee into the chest, and step with your right foot in the center of the band.
- Push the band forward until your leg is almost fully extended.
- Lower back to the starting position.
Tip: You might be able to use a lot more resistance with this so choose a stronger band.
Hamstrings exercises
Banded lying leg curl
Targets: Hamstrings
What to use: Tube bands with handles, pilates bands, large loop bands
How to perform the banded lying leg curl:
- Secure your resistance band to a secure doorway or column. Lie chest-side down on the floor. Loop the resistance band around your ankles (if you prefer, you can also do the 1-legged version.)
- Bring your legs toward your glutes by contracting the hamstrings.
- Release the tension at a controlled pace and return to the starting position.
Tip: Make sure you're initiating the movement with your hamstrings. If you’re new to the movement, try flexing your calves (point your toes backward) throughout the movement. Also, prevent your hips from rising (as much as possible).
Banded deadlift
Targets: Hamstrings
What to use: Tube bands with handles, pilates band, large loop bands
How to perform the banded deadlifts:
- Step on the middle of your resistance band with a slightly wider than shoulder-width stance. Hold the ends of your band with each of your hands.
- Bend your knees slightly and drive your hips back. Do not sit back; think of this exercise like a Romanian deadlift.
- Forcefully contract your glutes, driving them forward to the starting position.
Tip: Maintain a brace for core stability throughout the movement. This ensures you're engaging the hamstrings and not excessively shifting the load to your lower back.
Calves exercises
Banded standing calf raises
Targets: Calves
What to use: Tube bands with handles, pilates band, large loop bands
How to perform the banded standing calf raises:
- Stand in the middle of your resistance band. Ensure the band length between your feet and arms is equal on both sides.
- Hold the ends of your resistance band with each of your hands and lift your arms toward the side of your head as if you were going to perform an overhead press.
- While keeping your hands by your shoulder, stand on your toes. Contract your calves hard when you get to the top of the movement.
- After a short pause (1 second), slowly return to the starting position.
Tip: Contract your calves fully at the top position. To raise the difficulty of the exercise, consider standing on an elevated platform so you can stretch the calves below horizontal (at the bottom position) – giving you a greater range of motion. You can also do this one-legged for a greater challenge.
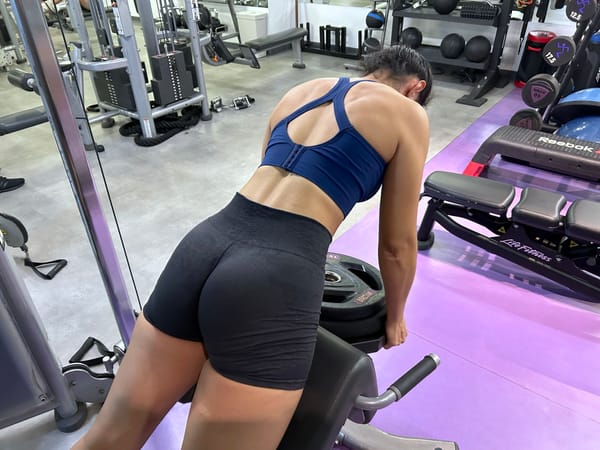
Glute exercises
Banded seated hip abduction
Targets: Glutes
What to use: Mini bands
How to perform the banded seated hip abduction:
- Sit on a bench with both feet firmly planted on the floor and knees bent at about 90 degrees. Wrap a resistance band around your thighs (just above your knees).
- Initiate the movement by pushing your knees outwards. Focus on contracting hard at the end position.
- Return to the start position slowly and repeat.
Tip: Use a slow controlled movement for this exercise. Use a pause at the end position to ensure you’re contracting fully. This exercise can also be done standing.
Banded glute bridge
Targets: Glutes
What to use: Mini bands
How to perform the banded glute bridge:
- Wrap a resistance band around your legs right above your knees. Lie faceup with your feet on the floor, with your knees bent 90 degrees.
- Raise your hips until your shoulders, hips, and knees are aligned. Start the movement by contracting your glutes and squeezing them on your way up.
- Lower your hips to return to the starting position.
Tip: Focus on initiating the movement with your glutes and nowhere else. This way, you’re really hitting your glutes.
Banded clamshell
Targets: Glutes
What to use: Mini bands
How to perform the banded clamshell:
- Loop your resistance band above your knees around both thighs.
- Lie on your left side and prop your head with your left hand. Bend both knees and bend at the hip so your thighs are perpendicular to your hip.
- Keeping your feet together, elevate your feet to hip height while your knees stay on the floor.
- Keep your feet together as you lift your top knee (right knee) toward the ceiling.
- Slowly lower your right knee down to return to your starting position.
Tip: If you find it too challenging to perform the exercise with your feet in the air, leave them on the ground and do the same movement.
Banded lateral walk
Targets: Glutes
What to use: Mini bands
How to perform the banded lateral walk:
- Loop your resistance band around both thighs.
- Stand in a quarter squat position (slightly above parallel), with your feet about hip-width apart and your hands at your chest or on your hips.
- Step to the right with your right foot so your feet are wider than hip-width. Follow with your left foot so your feet are hip-width apart again.
- Take three steps to the right, then three back to the left. That’s 1 rep.
Tip: Remember to brace your core and ensure constant tension in the band.
Standing banded kickback
Targets: Glutes
What to use: Mini bands
How to perform the standing banded glute kickback:
- Loop your resistance band around your ankles and stand with your feet hip-width apart and your core engaged.
- With your hands at your chest or on your hips, shift all your weight into your left leg and place your right toes on the floor about an inch diagonally behind your left heel. This ensures that you’re starting the exercise with tension in the band.
- Squeeze your core and tuck your pelvis under as you kick your right leg back about 6 inches.
- Return your right foot to tap the floor, keeping tension in the band.
- Complete all your reps on one side before switching legs.
Tip: Brace your core and avoid arching your back excessively during the movement. If you can't help but arch your lower back, reduce the range of motion and slow it down. The focus should be on contracting your glutes, not kicking as far back as possible.
Banded fire hydrant
Targets: Glutes
What to use: Mini bands
How to perform the banded fire hydrant:
- Loop your resistance band just above your knees.
- Start in an all-fours position with your hands under your shoulders and knees under your hips.
- Without shifting your hips, lift your left knee out to the side. Keep your core engaged so your body does not rotate open along with your knee lift.
- Slowly return to your starting position.
- Complete all your reps on one side before switching sides.
Tip: Brace your core throughout the movement to stabilize and not shift your hips. One way to make it more challenging (and, therefore, #bootygains), you can maintain constant tension in the band by stopping slightly short of the starting position.
Banded donkey kick
Targets: Glutes
What to use: Tube bands with handles, figure-eight bands, pilates bands, mini bands
How to perform banded donkey kick:
- Loop a resistance band around above your knees. Start in an all-fours position with your knees under your hips, wrists under your shoulders, and your core engaged.
- Keeping both knees bent, kick your right leg toward the ceiling. Contract fully at the top.
- Return your right knee to the floor.
- Do all your reps on one side, then switch sides.
Tip: Make sure you contract your glute hard at the top of the movement. Resist the urge to “bounce” out from the top and use too much momentum to complete the movement.
Resistance bands tips and tricks
Whoa. That was a lot.
Hopefully, you now understand how to use resistance bands in your workouts and have shortlisted a few resistance band exercises to try in your next training session.
But before you do, as a closing note, here are a few tips, tricks, and warnings (*ahem* so you don’t get b*tch-slapped by your bands *ahem*) you need to know to make the most of your resistance bands:
- Implement progressive overload: Give your muscles a reason to continue growing. If you find that a particular resistance band is getting too easy, switch to another with more resistance. You could also use 2 bands together in a pinch.
- Maintain band tension even at the start of the movement: You want a little tension at the beginning when performing resistance band exercises (no matter what exercise it is). This helps keep your target muscles engaged during the entire exercise.
- Stop using it if you notice cracks or tears: Seriously. Throw it out. No amount of money saved will be worth the searing pain and gigantic bruise on your face when your resistance band snaps in the middle of face pulls — or all other resistance band exercises, for that matter.
- Make sure the door pulls away from you: If you’re anchoring your bands to a door, please, please (please!) make sure that it pulls away from you. You don’t want to force the door open accidentally and knock yourself into another realm.
- Don’t anchor your bands to anything sharp: Doing so will likely wear down your band over time, causing it to snap. And if there’s anything you’ve learned from this article, it’s this: you don’t want that to happen.
Alright. That’s all for this article.